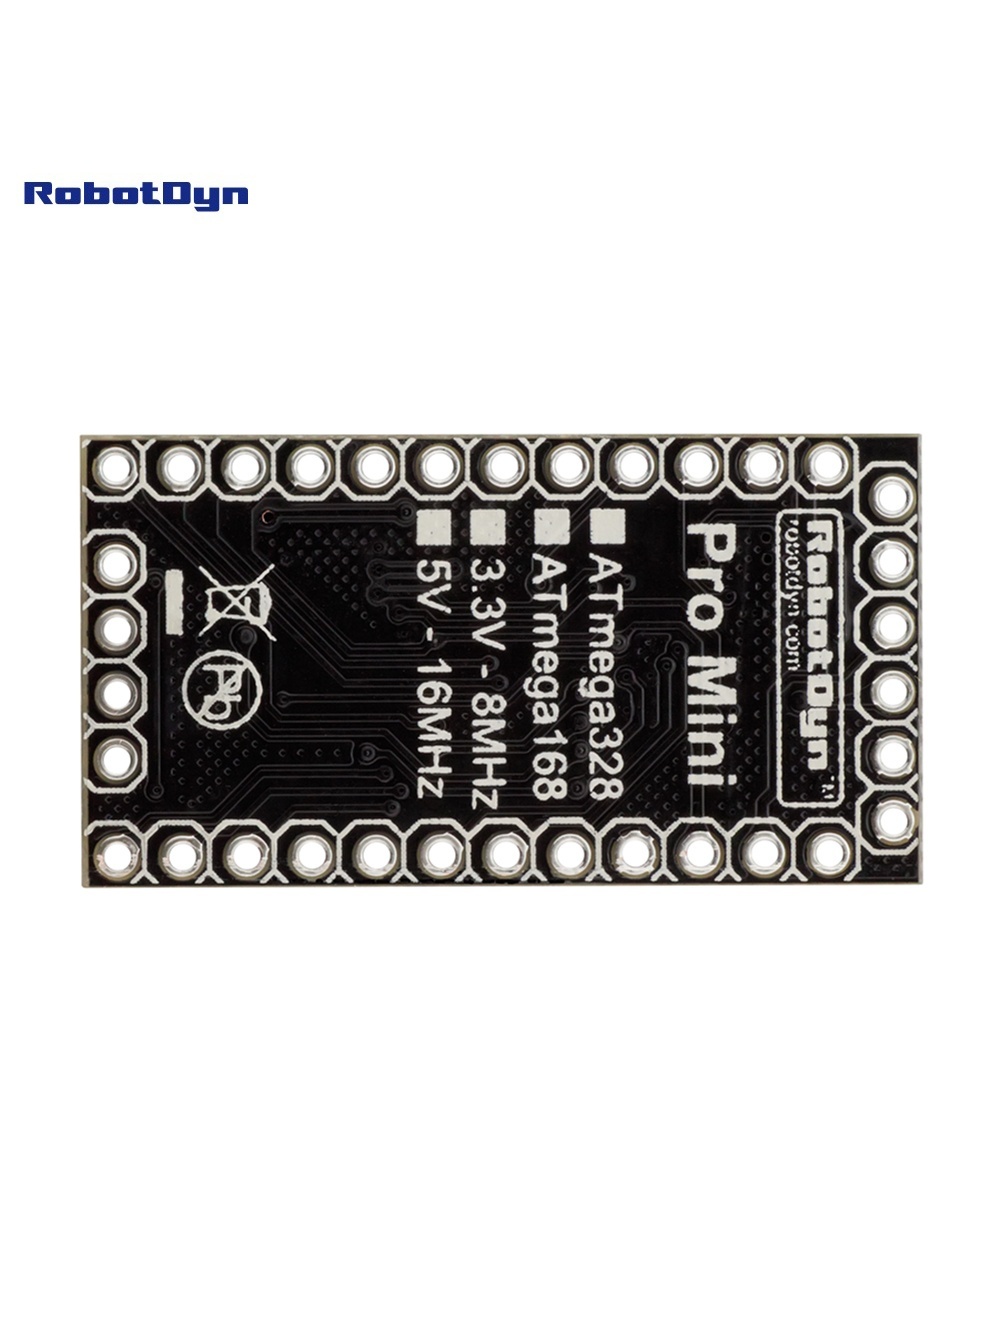


Specifications
| Microcontroller | ATmega2560 |
| IC Wi-Fi | ESP8266 |
| USB-TTL converter | CH340G |
| Power Out | 5V-800mA |
| Power IN. USB | 5V (500mA max.) |
| Power IN. VIN/DC Jack | 9-24V |
| Power Consumption | 5V 800mA |
| Logic Level | 5V |
| Wifi | Wi-Fi 802.11 b/g/n 2.4 GHz |
| USB | Micro USB |
| Clock Frequency | 16MHz |
| Operating Supply Voltage | 5V |
| Digital I/O | 54 |
| Analog I/O | 16 |
| Memory Size | 256kb |
| Data RAM Type/Size | 8Kb |
| Data ROM Type/Size | 4Kb |
| Interface Type | serial\OTA |
| Operating temperature | −40С°/+125С° |
| Length×Width | 53.361×101.86mm |
| antenna | Buil-in\external antenna |
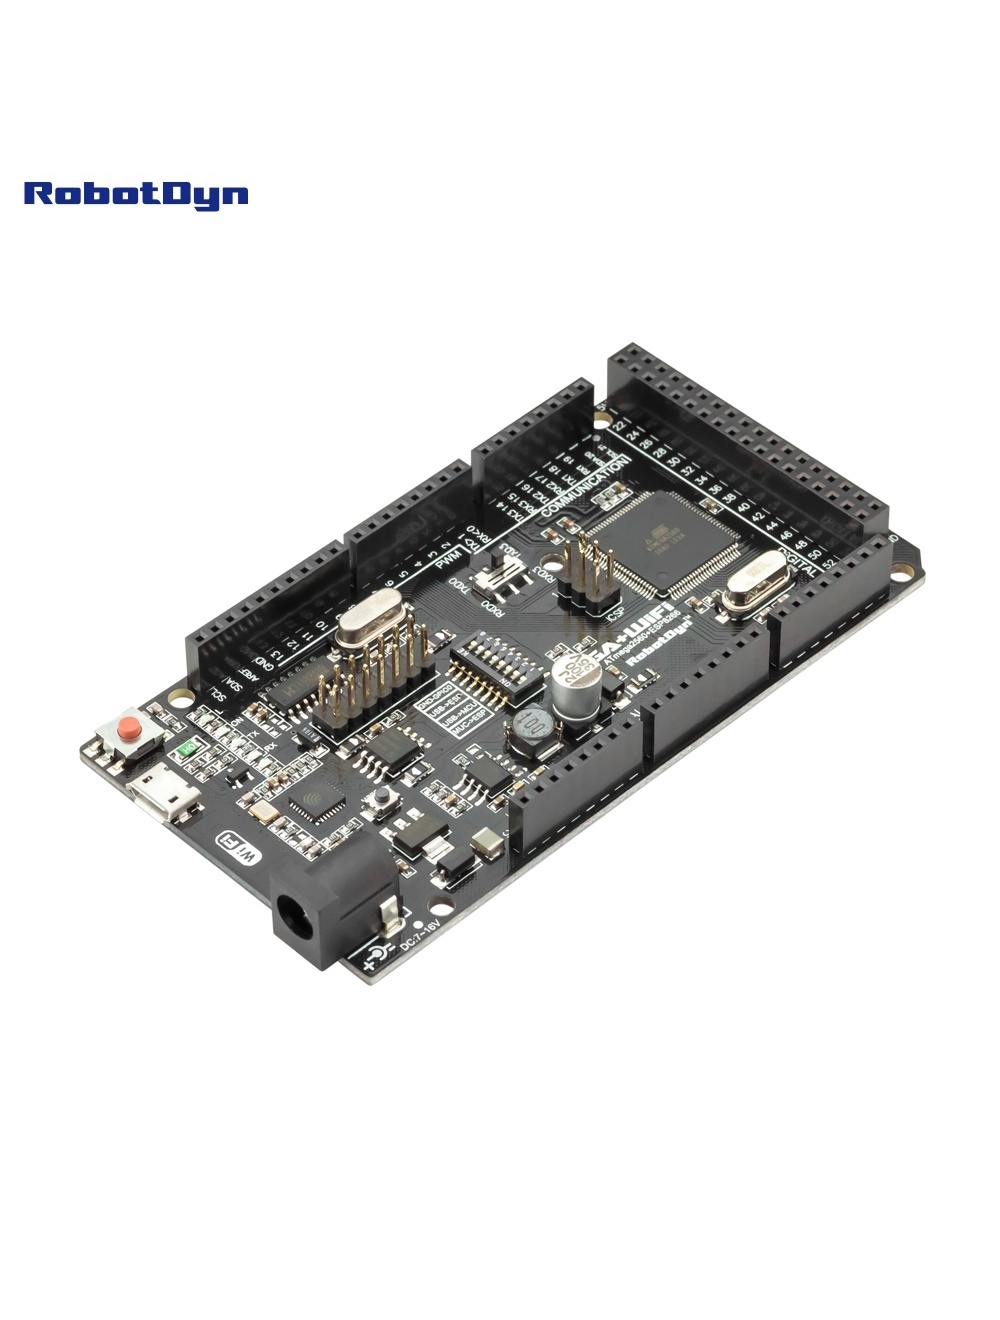
It is a customized version of the classic ARDUINO MEGA R3 board. Full integration of Atmel ATmega2560 microcontroller and ESP8266 Wi-Fi IC, with 32 Mb (megabits) of flash memory, and CH340G USB-TTL converter on a single board! All components can be set up to work together or independently.
Operating mode is selected by means of DIP switches on-board:
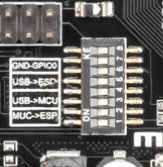
Switch status and mode selection:
| 1 | 2 | 3 | 4 | 5 | 6 | 7 | 8 | |
| CH340 connect to ESP8266 (upload sketch) | OFF | OFF | OFF | OFF | ON | ON | ON | NoUSE |
| CH340 connect to ESP8266 (connect) | OFF | OFF | OFF | OFF | ON | ON | OFF | NoUSE |
| CH340 connect to ATmega2560 (upload sketch) | OFF | OFF | ON | ON | OFF | OFF | OFF | NoUSE |
| CH340 connect to Mega2560 COM3 connect to ESP8266 | ON | ON | ON | ON | OFF | OFF | OFF | NoUSE |
| Mega2560+ESP8266 | ON | ON | OFF | OFF | OFF | OFF | OFF | NoUSE |
| All modules work independent | OFF | OFF | OFF | OFF | OFF | OFF | OFF | NoUSE |
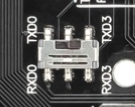
Also, have switch for change of connecting port between ATmega2560 and ESP8266
After choosing the mode of the board can proceed to set up the IDE
It is important that when the ESP8266 module is programming, it is necessary to press the button “Mode”

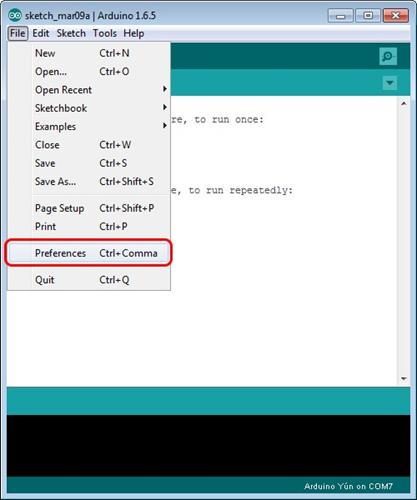
To begin open the Arduino IDE programming environment and go to settings
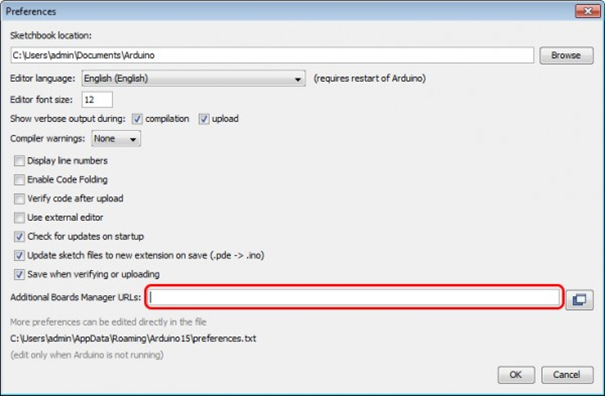
Then in the window that appears in the row, Additional Boards Manager URLs (marked in red) insert http://arduino.esp8266.com/stable/package_esp8266com_index.json link for installation in Arduino IDE additional scripts that would work with the modules ESP8266 and click OK
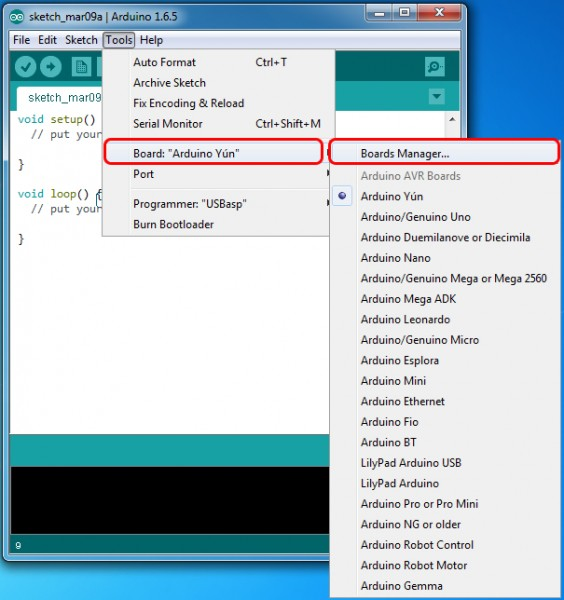
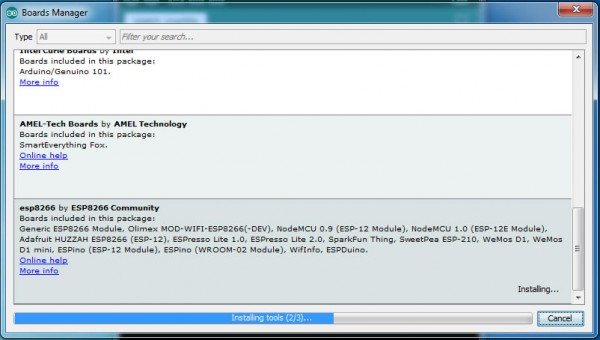
Then go to the Tools> Board> Boards Manager
In the window that appears, scroll through the list down to the script esp8266 by ESP8266 Community and click.
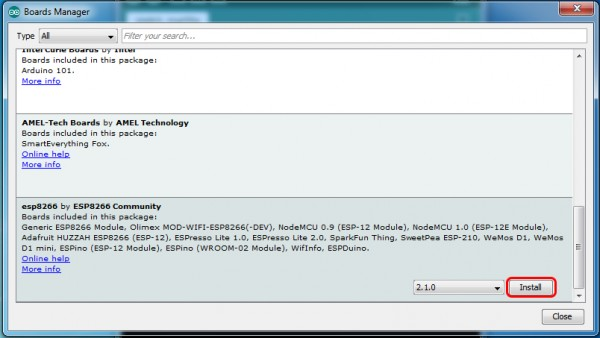
In the lower right corner will be able to select the version of the software, select the version 2.1.0 (the newest) and click the Install button
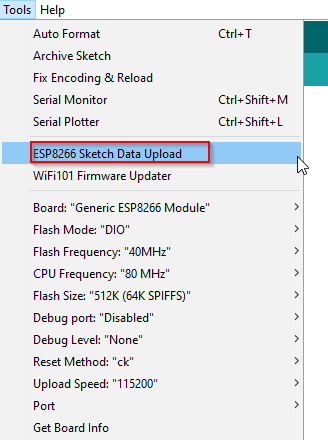
After installation, close the window and go to Tools> Board and see the list of available devices on the chip programming ESP8266

Next, you need to select the card as shown in the picture (Generic ESP8266 module)
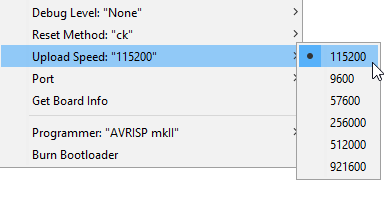
Select the upload speed – 115200
==========test sketch for ATmega2560===========
void setup()
{
Serial3.begin(115200);
pinMode(13,OUTPUT);
delay(500);
Serial3.println(“AT+CIPMUX=1”);
delay(2000);
Serial3.println(“AT+CIPSERVER=1,5000”);
delay(2000);
Serial3.println(“AT+CIPSTO=3600”);
delay(2000);
}
void loop()
{
while(Serial3.available())
{
char Rdata;
Rdata=Serial3.read();
if(Rdata==’A’|Rdata==’a’)
{
digitalWrite(13,HIGH);
delay(50);
}
else if(Rdata==’B’|Rdata==’b’)
{
digitalWrite(13,LOW);
delay(10);
digitalWrite(13,HIGH);
delay(10);
digitalWrite(13,LOW);
}
else
{
digitalWrite(13,LOW);
}
}
}